As the seasons begin to change, the weather outside is becoming perfect for a little light backyard maintenance. The cooler weather makes working in the yard a pleasant experience, and allows you to give less actual sweat to your sweat equity.
Thinking of installing a stone patio this fall? Let your Maryland stone supplier give you some tips on getting the job done right (please note: this is not a step-by-step guide).
Visualize with a Sketch
You no doubt have a vision in mind, so a great way of fleshing it out is to put pen-to-paper, and try and conceptualize what’s in your head. It will allow you to properly organize space, materials, and work order. After ordering your supply of stone, have it delivered to near the site so less hauling is necessary. This is also a good time to look for underground cables and gas lines. Remember, call before you dig!
Outline Your Project
For a quick and easy survey job, drive 3-foot stakes into the ground about a foot outside the patio area in several spots. Place a builder’s level in the middle, and look for an area where the patio will meet the house. While looking through the scope, have your helper move a leveling rod up and down until the the sites meet. Mark at the bottom, and repeat. Dig about 6-12-inches below the finish grade to the subgrade, and tamp down.
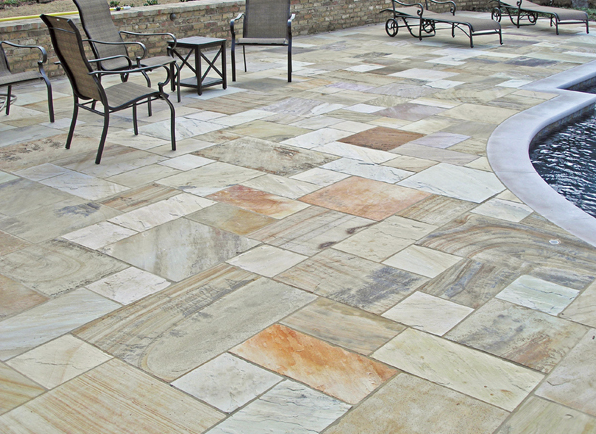
Laying the Stone
After setting your base with stone and dust and compacting it down. Followed by spreading your setting bed of crushed stone and checking for proper thickness, it’s time to lay your stone slabs. If the stone is heavy, have a helper assist you in lowering the slab slowly into place. Tap the corner slightly with a mallet until level. To ensure the slab is even, place a level in the center and align it. Repeat this step with conjoining stone and around each corner.
Finishing Up
In the final steps, you may need to cut stone to fit. Be sure you are properly equipped and attired for this part. Otherwise, your final steps should include edging with cobblestone for aesthetics, and spreading dust on top to seal between joints and small fissures. Spray the patio off with a hose to encourage joint tightening or even tamp it in. Then, grab a drink and enjoy your hard work.
To get started on your fall patio project, please contact us with all of your questions.